Get Creative! How to put text boxes and shapes into a document created in Google Docs
Author
Lumin Team
Published
Nov 19, 2025
Categories
PDF editing
Read time
5 min read

As someone who uses Google Docs for personal necessities and work, you probably want to know more about the online instrument's capacities. It is true that Google has already revolutionized the way people apply simple cloud-based software to create multiple kinds of documentation, presentations, and diagrams.
Table of contents
- 1. Google Drawings: things to know
- 2. Learn a Google Drawing menu
- 3. Steps on pasting a text box
- 4. Order changes for the shapes and content boxes of your worksheet
- 5. Sharing & Exporting
Share this post
People like visual content, yet pure text is not that exciting. Therefore, users try looking for some online software to intersperse the context with entertaining shapes or specifying text boxes. The good news is that there is good software to handle this; Google Docs. The following article will give you more information on boosting your creativity while using the integrated tool — Drawings!
Google Drawings: things to know
Before you delve into the function set of Google Docs and compose your best piece of work, you should get to know a particular tool better. Specifically, Google Drawings — a quality and uncomplicated navigation instrument. Using the tool, you can add drawings or any kind of box to the new file. The application is not a new one to users, but not everyone knows about all the built-in features.
Using Google Drawing, there is an opportunity to apply several handy items from the suggested settings. As a dialogue window opens, you will notice several options, including those that allow users to add lines, content boxes, callouts, multiple shapes, and all imaginable arrows. Despite the fact that Google Drawings is not a replacement for Photoshop, it is an excellent and free tool to cover many issues.
All you require is your Google account and some imagination to create your best piece of work. It does not matter which operating system you prefer - Windows or Mac OS. Below, you will find the information on how to place text boxes, maps, shapes in Docs, and learn how to export, share, or publish the altered documents.
Learn a Google Drawing menu
Once you have gathered thoughts together and are prepared to start working finally, click on the sign with '+' to open a new document. You should find an icon called 'Insert' in the upper menu that allows you to add any graphic elements. Then, there will emerge a pulldown menu with several options. Among these, there will be the one you need — Drawing.
Your task is to click on the ‘+’ icon so that you can start working with your drawing. As you do this, a corresponding dialogue box will appear. Below, you can see the way it should look:
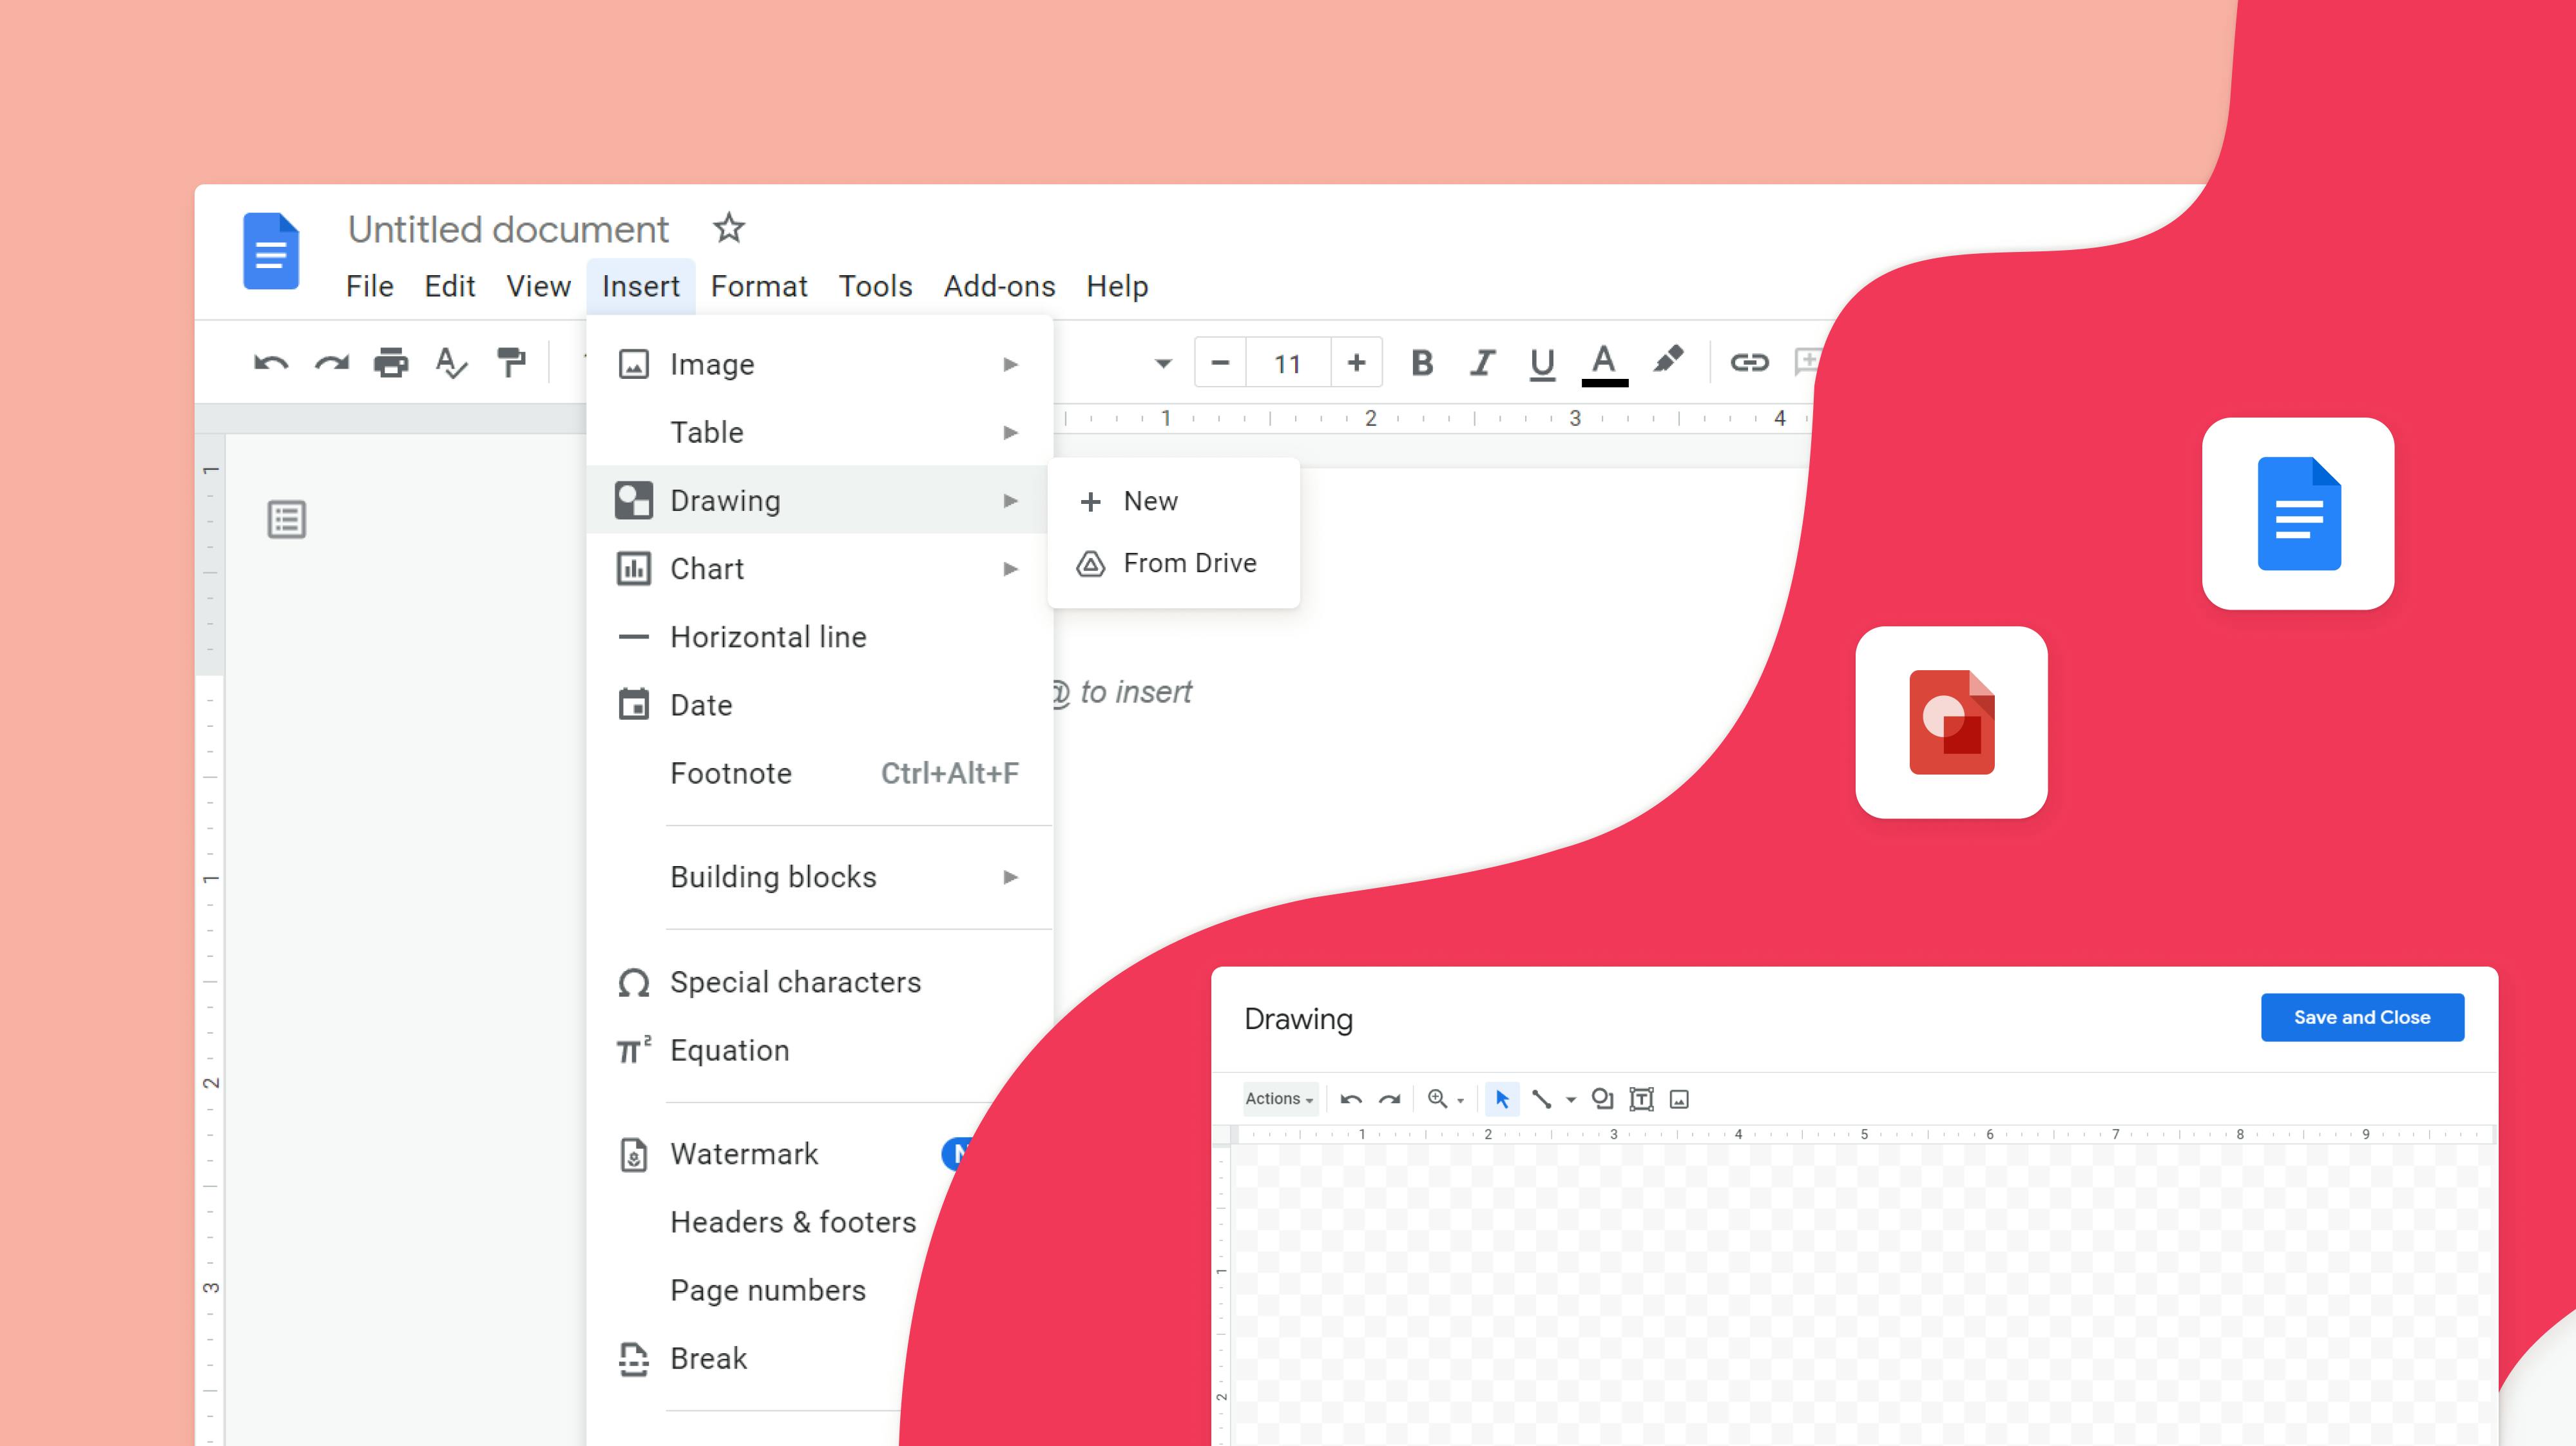
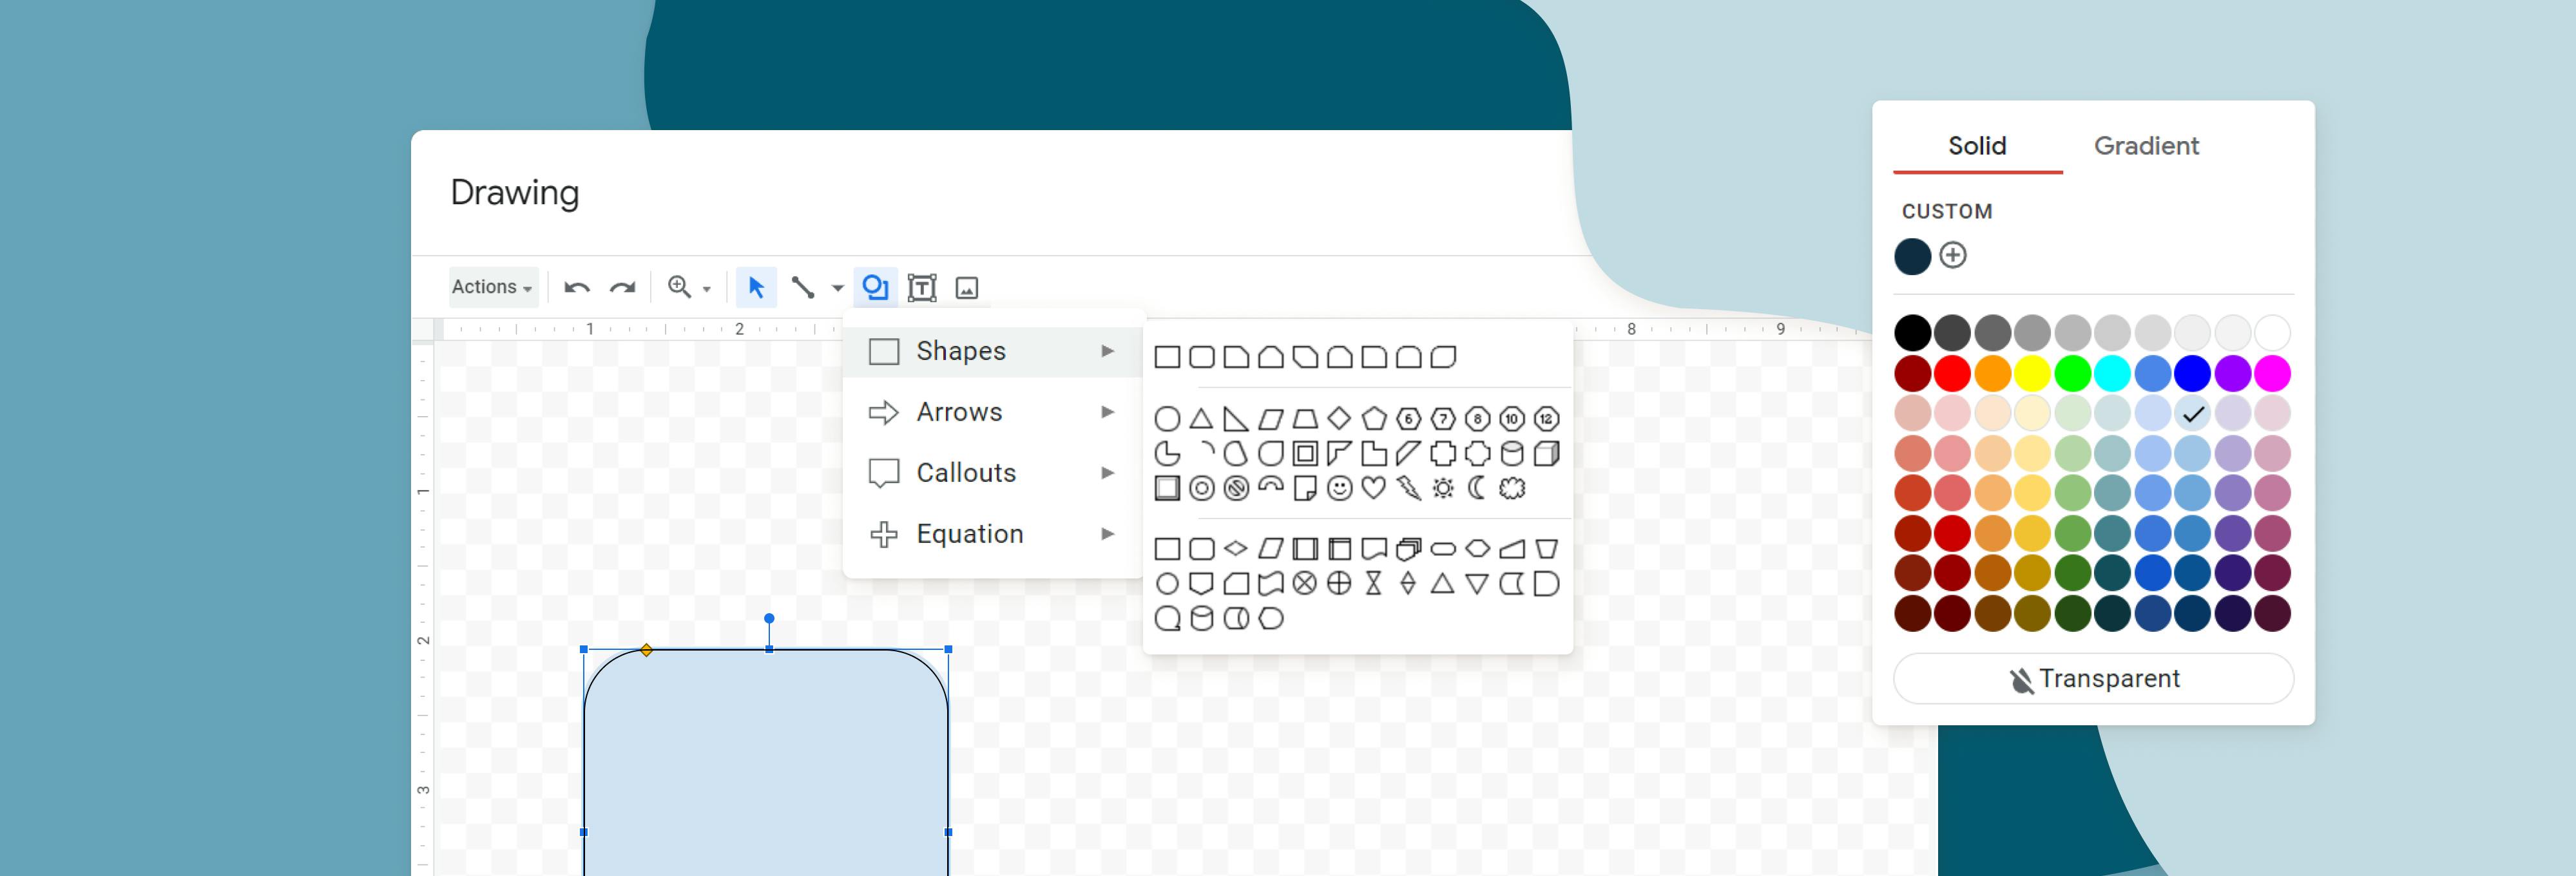
The dialogue menu is presented as a box with a wide range of opportunities. Users choose among such options as Undo and Redo, Zoom In to switch the scale, Image to make the drawing an appealing one, Text Box to have some content, and also the Shape option. The icon named 'Actions' includes several handy parameters you can notice on the PrintScreen below:
Also, there is an icon named 'Line;' by clicking on this icon, you will see the list of several types of lines. You are free to be creative and figure out which type fits you best. Nevertheless, this article is about inserting text boxes in Google Docs; let us continue and learn how to do this.
Steps on pasting a text box
Now, how can you load your text boxes? It’s as easy as apple pie!. Embedding a text box, a user fuels the text and gives a hint for which data is specifically critical, and stresses the most vital fact. Such boxes can be placed wherever you want, it is possible to move it all over the document experimenting with the best spot.
A box with the content presupposes some formatting after the creation. You can upgrade the palette for the background and play with the form of your lines. When you feel ready to try out the Drawing instrument for work, follow the rules on how to do this correctly below:
- The first step is to hover your mouse over the icon called 'Insert;' click on it.
- After you do this, find an option called 'Drawing' in the pulldown menu. There must be a specific Dialogue box, and you must find the button called 'Text box;' now, click on it.
- The third step is to build up your box — your task will be to click and drag the objects.
- Once you have completed the previous steps and an almost ready box is on your screen, it is time to type in the box's text content.
- Check whether everything is error-free; review the spelling and grammar. Look at what you have and determine whether everything looks great. If so, click on the Save button to proceed with other tasking orders. Voila! Your newly created text box is finished.
Text box customization
As you pass all the steps above, you can see that building a text box on your own and putting it into the file is not a tough thing to do. Yet, looking at the plain and ordinary box with your content, you may wonder what else you can do to make it catchier.
Customization of a box gives an opportunity to alter its content to conform with the desired format. Here are some rules on how you can do it yourself:
So, you insert a text box into a Google Doc successfully, now you need to pick a specific box you are willing to revise; the Drawing tool remains open as you do it because you will need it.
Now, you should look through the available formatting settings; as you make a decision, click on the desired option to use it for your newly constructed text box and make some modifications.
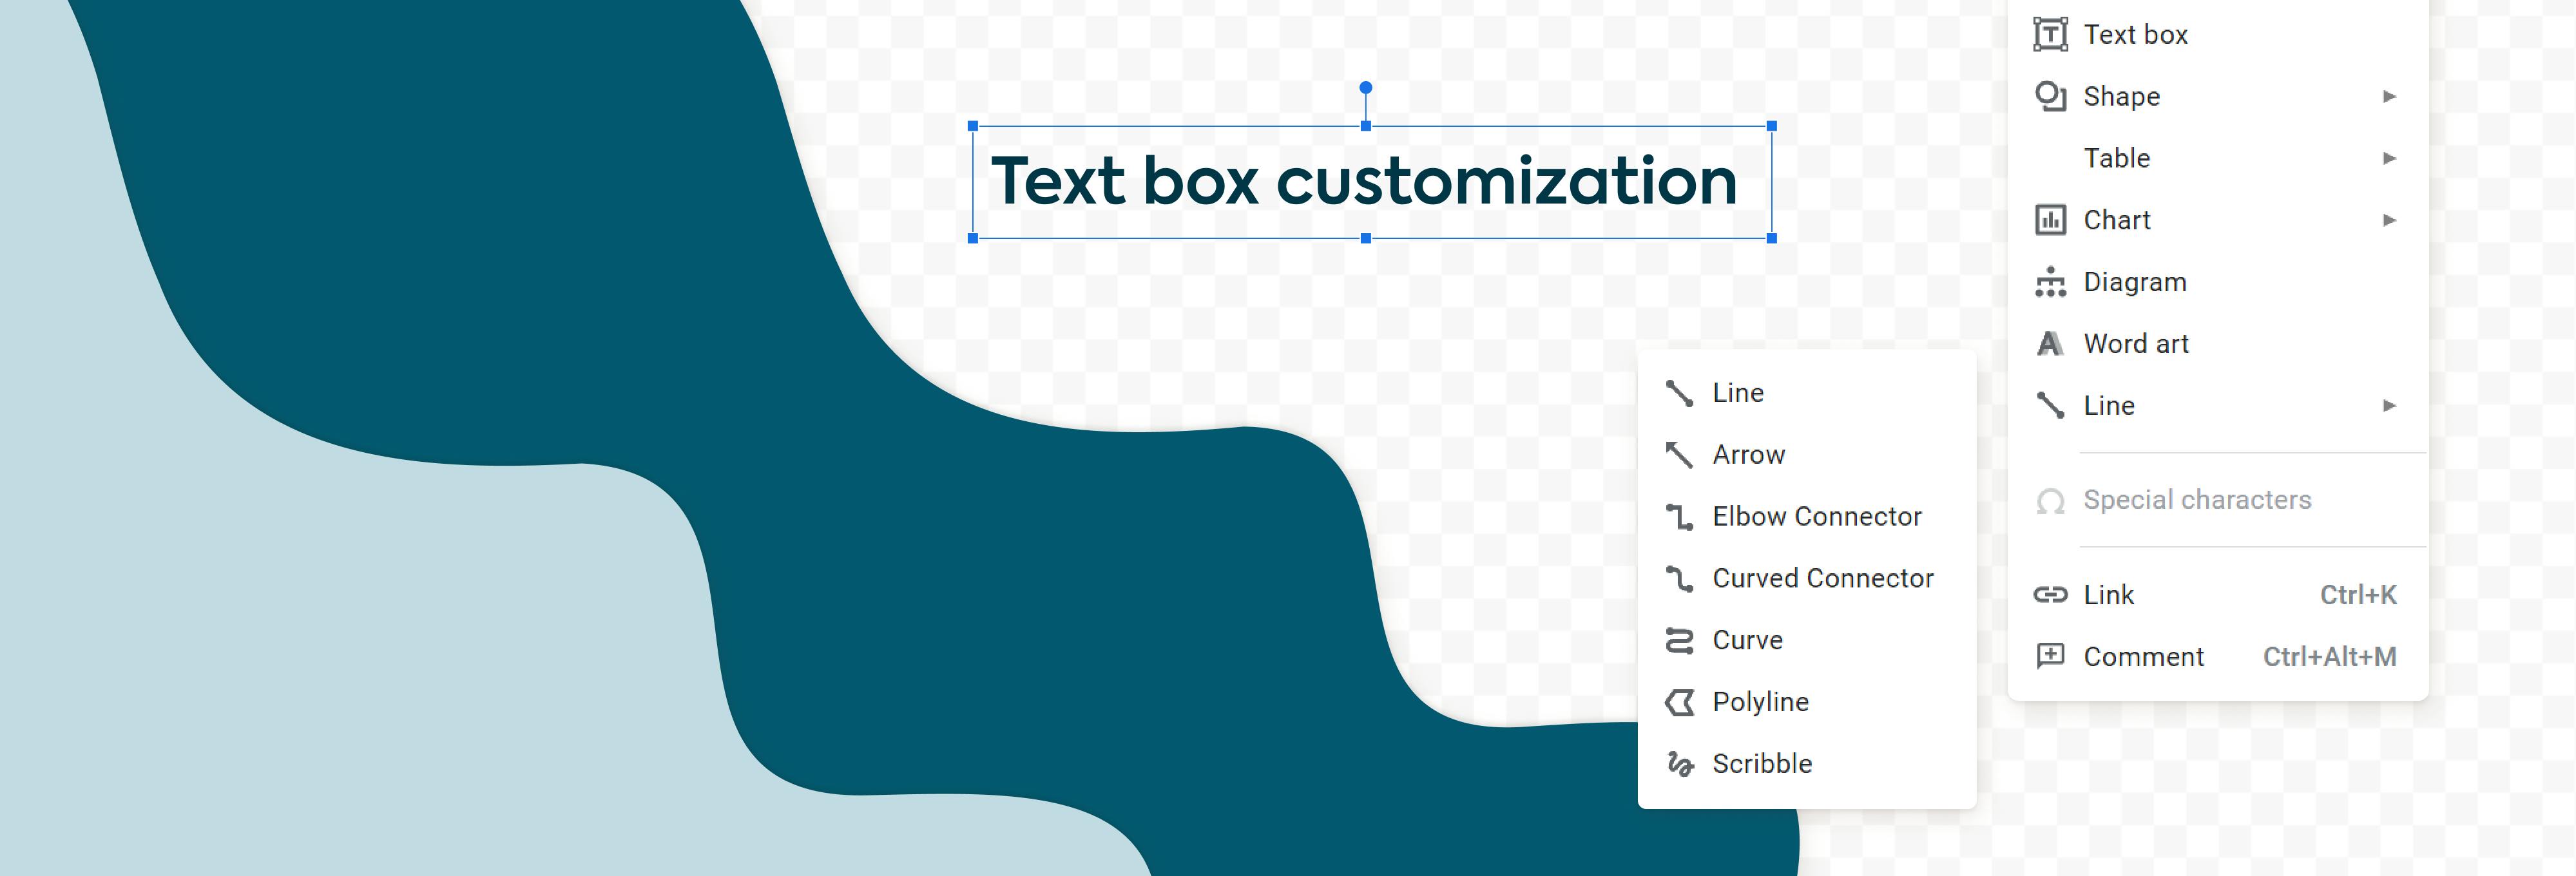
The option named 'Actions' allows you to add lines, connectors (elbow and curved ones), arrows, standard curves, scribbles, and polylines. Keep in mind that there is an opportunity to use stunning titles with WordArt or insert an image to further customize the boxes.
As for the formatting of the content, you can try to play around with the border color, dash, and weight; ranges of the font size, alignment, and line spacing; all of these features can be found in the upper row of the Drawing menu. A specific button prevents some elements from overlapping so that the entire table looks appropriate.
At this point, you can decide which spot is the most effective one for your text box. Just drag it around the file to see where it works best.
The positioning of the boxes presupposes that you can either bring it to the back or front. This opportunity is helpful in the times when you notice some overlapping objects. When you insert a text box with Google Docs, consider applying the icons called 'Bring forward' (so that a particular image is in front of another one), or you can apply 'Send backward' (to put it behind a more critical element).
Google Drawing to paste the shapes
In addition to Google Docs insert text box, there is an opportunity to add some shapes as well. At your disposal, the software provides several items you can use for your drawing. At your disposal, there are the following capabilities:
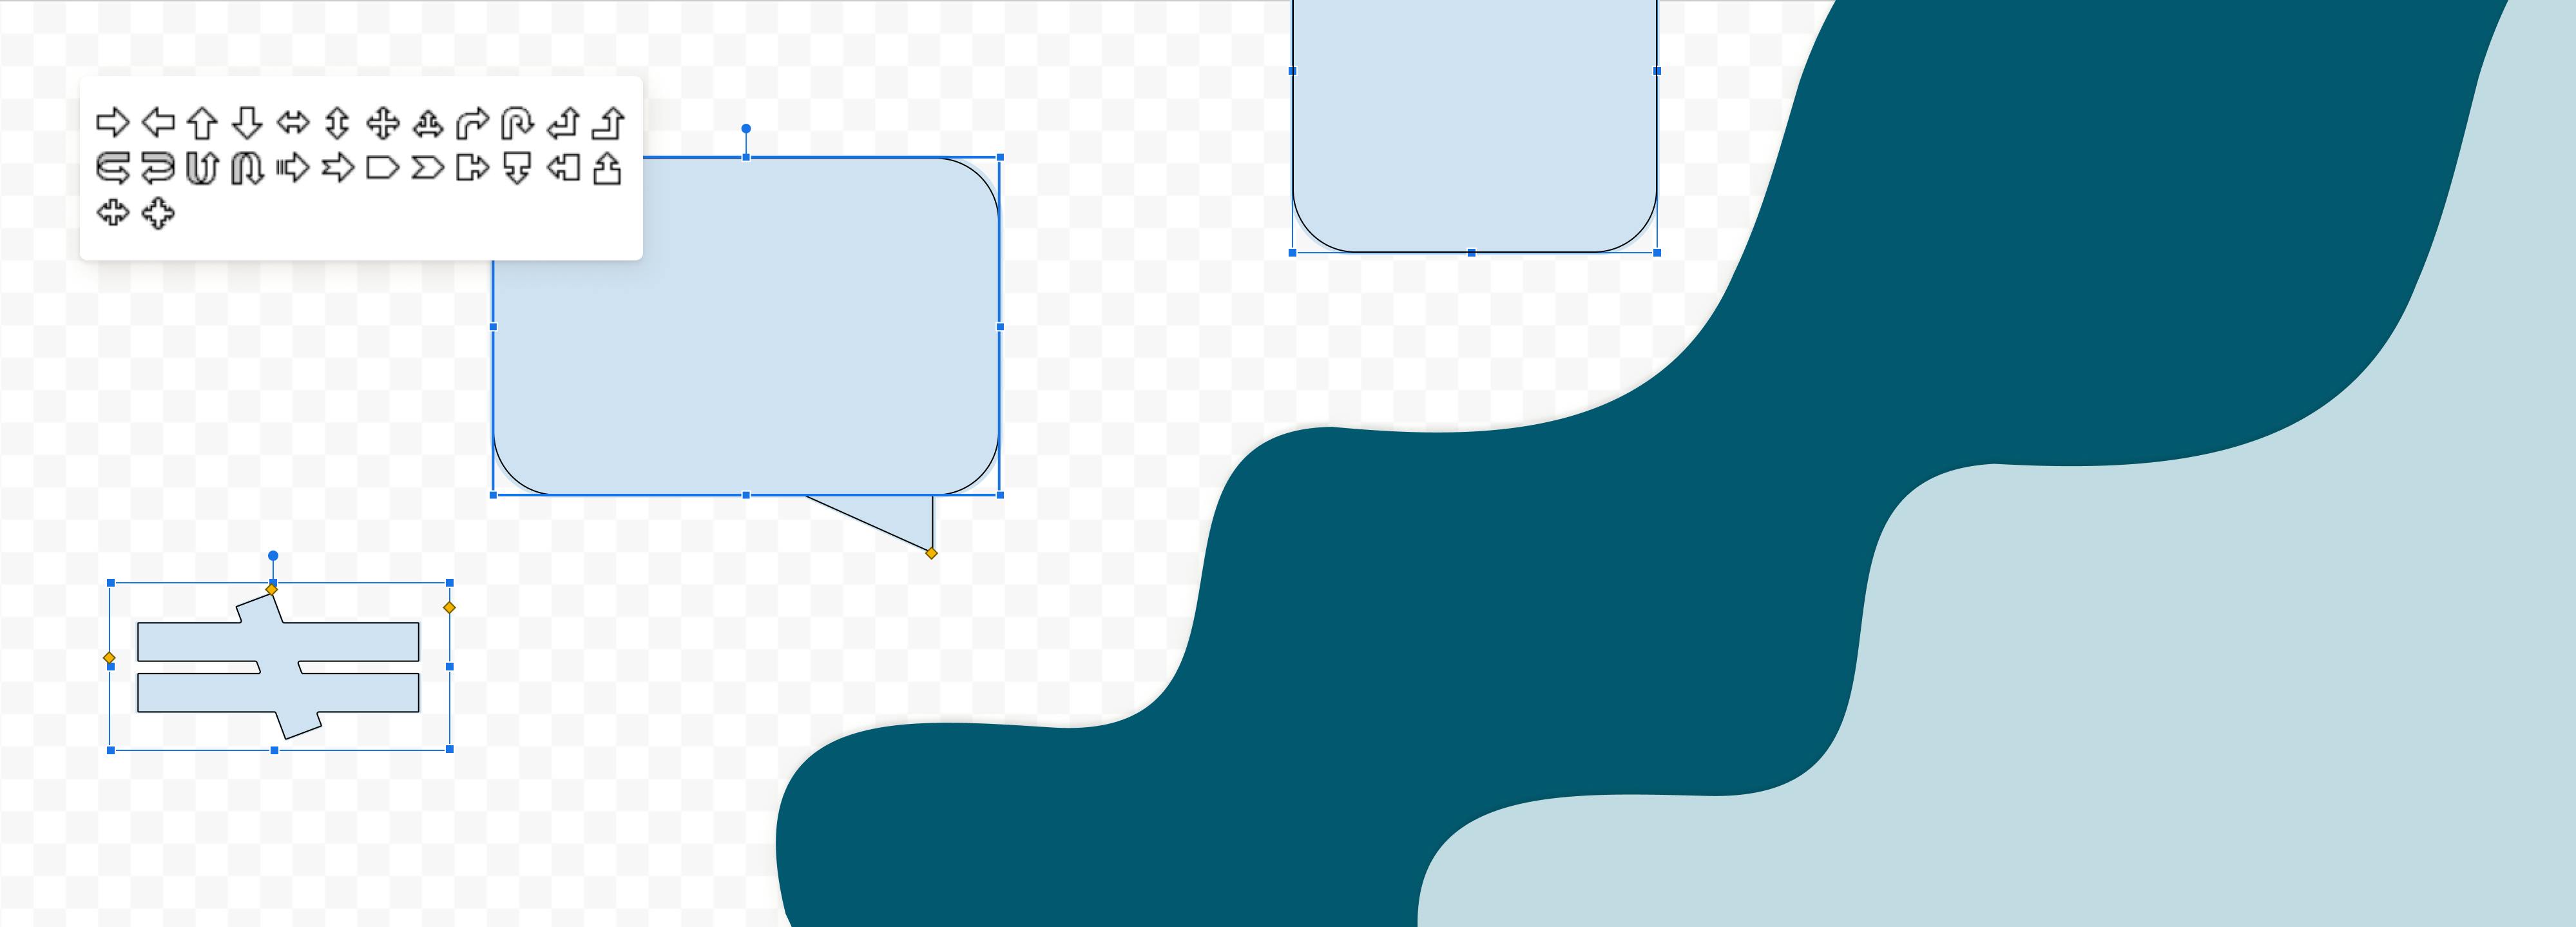
- Callout feature.
- Squares of diverse forms.
- Stylish arrows.
- Flowchart shapes.
- Stars.
Whatever you decide to try for yourself, every item is fully customizable.
The shapes help users make the text even more appealing. What is more, the content becomes more readable and understandable if everything is made in a proper way.
You will definitely find the available shapes quite useful while creating some diagrams or flowcharts. These simple instructions demonstrate how to paste some figures:
- Access your Google account to reach out to Google Docs; you should click on the icon that says 'Insert.' As the dropdown menu appears, find and pick Drawing.
- Now, you must see an already familiar Drawing dialogue box.
- Click on the Drawing icon; you already know where to find it — on the upper dialogue box menu. Now, you should point your mouse right on the Drawing icon; as you do this, a pop-down menu will emerge. After this, you can see how many figures are there, and you are free to select whichever you want.
- To alter the size of your shapes, click and drag the item to select the perfect size. Great! Now, after you let go of the mouse, you will see a ready-made and revised shape.
Sure, you can add some more objects; it entirely depends on what you are planning to mold and how you want to utilize the elements.
In the end, when all your shape manipulations are done, you must click on the button called 'Save & Close.' Now, as the Drawing window closes, you will see the drawing in the file.
After you have completed all the steps to Google Doc insert shape, you may see that some editing is required. To alter and revise your form, click on a concrete image and find a corresponding button to change the shape's size, location, or rotation.
If you are not satisfied with the way the shapes interrupt your text or it has become irrelevant for some reason, you are free to delete it using the Delete button or a Backspace.
Getting more creative with useful mind maps!
While diagrams and graphics presuppose the use of figures and content boxes, people choose few models of the shapes to compose a mind map. What is a mind map? It is visual content with the help of which you can structurally and logically represent an idea. Here is how you can create your mind map:
Go to your Google Docs and create a new document there. For this, you are to click on the '+' icon - this is nothing hard; you have done this many times before. Now, open the document.
At this moment, you can start drawing a personal mind map with your favorite software. In order to do this, you will need to repeat the procedure you have already used before - with the Drawing tool. Look for the Insert tab, and then, after you click on it, select the option called 'Drawing.' In the pop-up window that you see after this selection, there will be a set of commands at your disposal. Using each of these, you will complete the necessary map. In the window of the Drawing dialogue, you will need to choose some shapes, lines, or pointing arrows as you apply the Google Docs insert shape option. Also, inserting a text box with the Google Docs platform can diversify the content for your future map.
The arrows, lines, or connectors will show the link between the objects and the textual message to explain your point. The approximate look of your map will be like this:
- After you complete your map, you may also want to bring some of the objects to the front or back and use a corresponding option.
- The editing step is all about the revision of your map, fixing the sizes of individual elements, changing palette, fonts, or even adding some pictures and images. The principle of editing shapes is the same for the content boxes.
- That is it; your map is ready. Now, click on the button which says 'Save' to proceed with your worksheet.
- After you do this, the mind map appears on your blank page in Google Docs. Even though some consider Google Docs editing tools limited, you can try editing the drawing via a PDF editor. Note, however, that you should first save the drawing in a PDF file; now, you should open it in the online editing software of your choice to continue all the modifications.
Order changes for the shapes and content boxes of your worksheet
It might happen that after you complete all of your text box and shape manipulations, you are likely to notice that some of the figures overlap with others. It is not a problem, though, as you can fix this using the options named 'Ordering.' With this option, a user can bring one element in front of another one. In the case that several elements obscure some vital objects, it would be better for you to use the button called 'Send Backward' or 'Bring Forward.'
If you feel there is a need to modify the order of the elements in the document, there are several step-by-step tips on how to do it quickly:
- You are to return to your handy menu of the Drawing dialogue to pick the objects that require specific ordering changes.
- Find the button that says Order, point your mouse so that you can select the ordering you need.
- After this, you will notice that the ordering inside the drawing changes; it is time to save all the alterations you have made.
Sharing & Exporting
People like to use something that is already done by someone else. Remembering the rule of Giving & Receiving, consider sharing your drawing with chosen users. If you have built up a diagram that might be helpful for someone else, you can share it with other Google Docs users. An extensive sharing option allows you to share the drawing on the internet.
You can now save the item in one of the suggested formats: PDF, JPEG, PNG, or SVG. Note that inserting text box in PDF is also possible! If you prefer this format, there is nothing to worry about. By doing this, you give others an opportunity to download, edit, and utilize your drawing. Here is the way to do this:
- To export the newly made drawing to your laptop, go to the icon called 'File,' click on it, then choose the command called 'Download As' and select the format that is most suitable for you; there will be a few popular options.
- If you have chosen to share the drawing with particular users, prepare a list of the emails of the users who want the drawing. Now, go to the Share icon, click on it. You will see the People box; copy-paste the prepared emails straight into the box.
- Another way to share the file is to copy a shareable link using the corresponding button. By doing this, you get the link that allows the chosen users to see and offer some editing for your drawing in an anonymous mode. As you do this, click on the button that says Done.
If you are willing to publish your drawing on the Internet, the option Publish to the web will help you with this. You can notice a suitable option in the Files section. As you do this, your drawing will become publicly accessible.
Note that it is possible to pick the drawing's size as well. If you need this, you must click on the specific drawing to see a dropdown menu. On the bottom, there must be an 'All image options' command. After this, a menu emerges on the right hand side of the screen. Google Docs offers you to redact the size, text wrapping, and rotation. Select the button named 'Size' to modify the width, height, width scale, and height scale as you wish.
If you decide to stop publishing the drawing on the Internet for some reason, there is a way to do this. Go to the Files, scroll down to see the command 'Publish on the web,' click on it. After that, you will have to find the lines that say Stop publishing in the menu; pick this option.
Inserting shapes or text boxes is not hard at all. Nevertheless, knowing some crafts, you can create something original. The boxes with content and figures have a similar algorithm of creation that is extremely simple, even if you are not an advanced Google Docs user. Be creative and make your diagrams, mind maps, and text boxes within the document with accessible online tools for free.
Share this post